
Article Plan: Status Plug-in Timer Instructions
This comprehensive guide details everything about status plug-in timers, from basic operation to advanced features, ensuring automated control of your appliances effectively.
Status plug-in timers offer a simple, cost-effective solution for automating the control of electrical devices. These handy gadgets insert directly into a standard wall outlet, allowing you to schedule when appliances turn on and off, without manual intervention.
From illuminating homes while away to managing holiday lights or controlling aquarium equipment, their versatility is remarkable. Available in both digital and mechanical formats, they cater to diverse user preferences. Digital timers provide precise scheduling, while mechanical timers offer a straightforward, tactile experience.

Understanding how these timers function empowers you to enhance convenience, improve security, and potentially save energy. This guide will navigate you through the world of status plug-in timers, ensuring you maximize their benefits.
What is a Status Plug-in Timer?
A status plug-in timer is an electromechanical or electronic device designed to switch an electrical appliance on or off at pre-set times. It physically plugs into a standard electrical outlet, creating a convenient intermediary between the power source and your device.
These timers come in two primary types: mechanical and digital. Mechanical timers utilize a rotating dial with pins to define on/off cycles, while digital timers employ a programmable interface for precise scheduling. Both types often feature an override function for manual control.
They are commonly used for lamps, holiday decorations, and small appliances, offering automated control and enhanced convenience.
Common Uses for Status Plug-in Timers
Status plug-in timers offer versatile applications throughout the home and beyond. A frequent use is automating lamps, creating the illusion of occupancy for security while away, particularly during extended vacations. They are ideal for controlling holiday lighting, eliminating the need for manual switching each day.
Small appliances like coffee makers or slow cookers can be scheduled to operate at specific times, providing convenience. Garden lighting and fountains also benefit from automated control. Users also employ them to manage terrariums or reptile heating, ensuring consistent environmental conditions.
Essentially, any appliance benefiting from scheduled operation is a candidate for a status plug-in timer.
Types of Status Plug-in Timers
Status plug-in timers broadly fall into two categories: digital and mechanical. Digital Status Plug-in Timers offer precise programming with features like 24-hour cycles, multiple on/off settings, and override functions. They often include battery backups to retain settings during power outages and summertime adjustments.
Mechanical Status Plug-in Timers utilize a rotating dial with pins that are pushed in to define on and off periods. These are simpler to operate, relying on an internal motor to rotate the dial. They are generally more affordable but offer less programming flexibility than their digital counterparts.
Choosing between the two depends on your specific needs and desired level of control.
Digital Status Plug-in Timers
Digital timers provide a user-friendly interface for precise scheduling. They typically feature an LCD screen for easy programming of on and off times, often in 24-hour or 12-hour formats. A key benefit is the override function, allowing temporary operation without disrupting the programmed schedule.
Many models include a 100-hour battery backup, safeguarding your settings during power interruptions. The summertime/wintertime function simplifies clock adjustments. These timers excel in scenarios demanding complex schedules or remote control, offering convenience and energy savings.
Look for models with clear displays and intuitive button layouts for optimal usability.
Mechanical Status Plug-in Timers
Mechanical timers utilize a rotating dial with segments representing the 24 hours of the day. To program, simply push in the pins at the desired on and off times. A small motor internally rotates the dial, activating or deactivating the power supply based on pin positions.
These timers are known for their simplicity and reliability. Listen closely when you plug it in; a faint motor sound indicates operation. They are ideal for basic scheduling needs, like lamps or holiday lights.
While less precise than digital models, they offer a cost-effective and durable solution.
Safety Precautions Before Use
Prioritize safety when using status plug-in timers. Always check the voltage and wattage of your appliance to ensure it doesn’t exceed the timer’s specifications – overloading can cause fire hazards. Plug the device into the timer before inserting the timer into the mains outlet.
Never use timers outdoors or in damp environments. Avoid using them with heating appliances that lack a thermostat, as unattended operation could be dangerous. Regularly inspect the timer for damage, and discontinue use if any issues are found.
Keep out of reach of children.
Understanding the Timer Face (Mechanical Timers)
Mechanical timers utilize a rotating dial with segmented sections representing the 24 hours of the day. Push in the pins at the times you desire your appliance to switch on and off; these pins physically interrupt or allow the electrical flow. The dial slowly rotates, activating or deactivating the circuit as the pins enter and exit the active segments.
Listen closely when you plug it in; a faint motor sound indicates the dial is rotating. The segmented dial’s design allows for multiple on/off cycles within a 24-hour period. Understanding this mechanism is key to accurate programming.
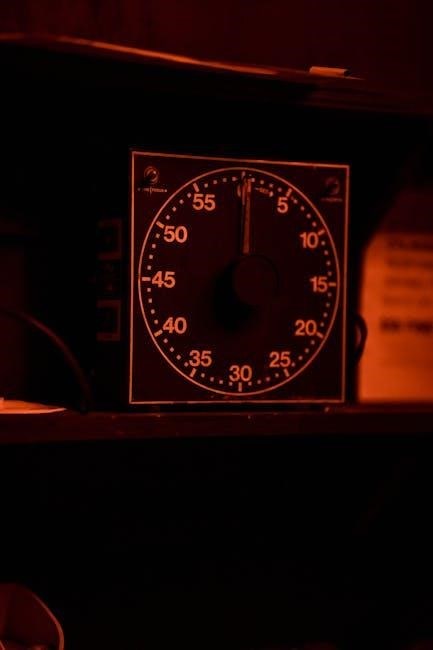
Segmented Dial Explanation
The segmented dial is the core of a mechanical timer’s functionality. It’s divided into 24 sections, each representing an hour of the day. These sections alternate between ‘on’ and ‘off’ states, controlled by the position of the pins. When a pin is within a dark (or colored) segment, the circuit is closed, and the appliance receives power.
Conversely, when a pin enters a white (or clear) segment, the circuit opens, cutting off power. The length of each segment dictates the duration of the on/off cycle. Careful observation of these segments is crucial for precise timer settings.
Pin Placement and Function
The pins on a mechanical timer are small, movable tabs that determine when your appliance turns on and off. Typically, there are multiple pins, allowing for multiple on/off cycles within a 24-hour period. To activate a time slot, push the pin into the dial – this closes the circuit for that hour.
To deactivate, simply pull the pin out. The position of each pin corresponds to a specific hour, dictating the start and end times of each cycle. Accurate pin placement is vital for achieving the desired scheduling, ensuring your devices operate as intended.
Setting Up a Mechanical Status Plug-in Timer: Step-by-Step
First, plug the timer directly into a wall outlet, ensuring it’s securely connected. Then, before plugging in your appliance, set the desired “On” times by pushing the pins inward on the rotating dial to correspond with the hours you want power delivered. Next, set the “Off” times by pushing pins for the hours you want the appliance switched off.
The dial rotates slowly, and when it reaches a pin, the circuit closes or opens. Double-check pin placement for accuracy. Finally, plug your appliance into the timer – it’s now ready to operate automatically!
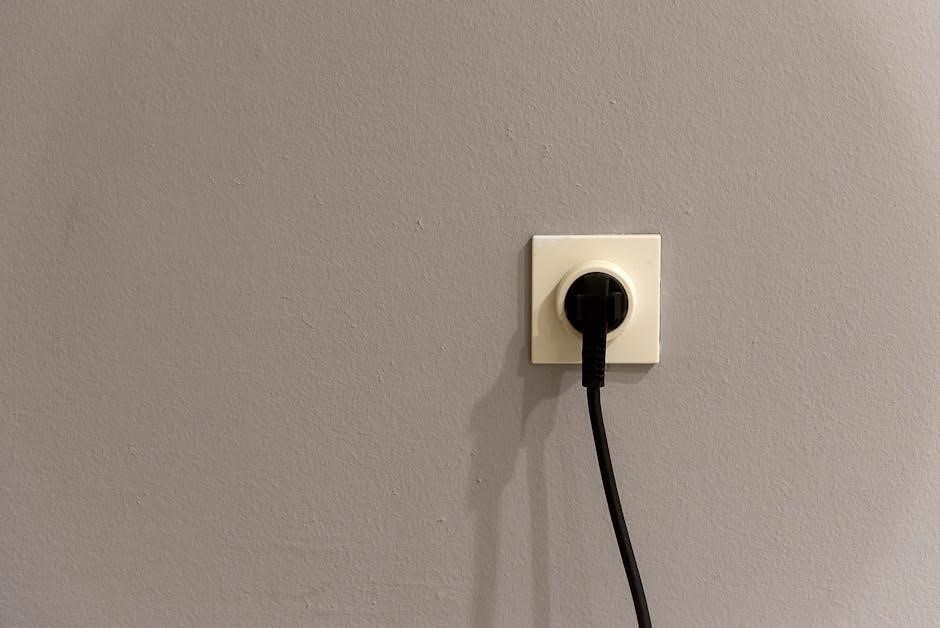
Step 1: Plugging in the Timer
Begin by locating a standard electrical outlet suitable for the timer’s plug type. Ensure the outlet is functioning correctly before proceeding. Carefully insert the timer’s plug fully into the outlet, confirming a secure connection to prevent accidental disconnections or power interruptions.
It’s crucial to plug the timer before connecting your appliance. This allows for safe and accurate setup of the on/off times. Avoid using extension cords if possible; direct connection to the wall outlet is recommended for optimal performance and safety.
Step 2: Setting the “On” Time
For mechanical timers, locate the segmented dial and identify the pins. Push the pins inward at the precise time you want your appliance to turn on. Each pin represents a specific time slot throughout the 24-hour cycle. Ensure the pins are fully engaged to guarantee activation.
Digital timers require navigating the programming menu to set the desired “on” time. Use the timer’s buttons to input the hour and minute. Confirm your selection and save the setting. A successful “on” time setting will typically be indicated by a display confirmation or a subtle light indicator.
Step 3: Setting the “Off” Time
With mechanical timers, repeat the pin placement process, but this time, position the pins to correspond with the time you want your appliance to switch off. Remember, each pin represents a time slot. Ensure the “off” time pins are set accurately to avoid unintended operation. Push the pins firmly into the dial.
For digital timers, access the programming menu again and input the desired “off” time, mirroring the process used for the “on” time. Save the setting. Many digital timers allow for multiple on/off cycles, enabling complex scheduling. Verify the programmed times on the display.
Setting Up a Digital Status Plug-in Timer: Step-by-Step
Digital timers offer greater programming flexibility. Begin with the initial setup, often involving setting the current date and time. This establishes the timer’s internal clock; Access the programming mode, usually via a “Program” or “Set” button.
Next, program the “on” and “off” times. Input the desired start time for your appliance, then the end time. Many models allow for daily or weekly schedules. Utilize the override function for temporary operation without disrupting the programmed schedule. Remember the 100-hour battery backup preserves settings during power outages.
Initial Setup and Clock Setting
Before programming, the digital timer requires accurate time and date settings. Upon plugging in, the display will likely prompt for this information. Use the “Hour” and “Minute” buttons to adjust the current time. Some models include a “Day” setting for accurate date input.
Pay attention to the AM/PM indicator, ensuring correct time of day. The easy-to-use summertime function simplifies seasonal adjustments. A 100-hour battery backup ensures your settings are retained even during power interruptions, minimizing reprogramming efforts. Confirm the settings before proceeding to schedule your on/off times.
Programming “On” and “Off” Times
To schedule operation, access the programming mode, typically via a “Program” or “Set” button. Use the directional buttons to navigate and input your desired “On” time – the moment you want your appliance to activate. Repeat this process to set the “Off” time, specifying when the appliance should switch off.
Many timers allow multiple on/off cycles daily, offering flexible scheduling. The override button provides temporary control, activating the device without disrupting the programmed schedule. Confirm each setting before saving, ensuring accurate automation.
Utilizing the Override Function
The override function offers temporary control, allowing you to activate your appliance outside the programmed schedule without altering the set timings. Typically, a dedicated “Override” button initiates this feature, instantly powering on the connected device.
This is useful for immediate needs, like extra lighting during unexpected events. The appliance will remain on until the next scheduled off-time, after which the timer resumes its normal programmed operation. Remember, the override is a temporary measure and doesn’t change the underlying schedule.
Power Outage and Battery Backup
Power outages can disrupt timer settings, but many status plug-in timers include a battery backup system to mitigate this. This backup, often around 100 hours, preserves your programmed schedules during short-term power interruptions.
Upon power restoration, the timer automatically reverts to its saved settings, resuming operation without requiring reprogramming. However, prolonged outages may eventually deplete the battery. It’s wise to check the timer’s settings after any significant power loss to ensure accuracy. This feature provides peace of mind and consistent automated control.
The Summertime/Wintertime Function
Many digital status plug-in timers feature a dedicated summertime/wintertime function, simplifying clock adjustments for daylight saving time. This function allows you to easily advance the clock by one hour in the spring (summertime) and retract it by one hour in the autumn (wintertime) without disrupting your programmed on/off schedules.
Typically, a button or setting within the timer’s interface controls this adjustment. Consult your timer’s manual for specific instructions, as the process can vary between models. Utilizing this function ensures your timer remains synchronized with the correct time, maintaining accurate automated operation throughout the year.
Troubleshooting Common Issues
If your status plug-in timer isn’t functioning correctly, several common issues may arise. A timer failing to turn on/off often indicates an incorrect setup or a power supply problem. For mechanical timers, ensure the pins are correctly positioned around the dial. If the dial isn’t moving, listen closely – a faint motor sound confirms it’s working.
Check the power outlet and ensure the appliance is securely plugged into the timer. If problems persist, consult the manual or consider a replacement. Remember to verify wattage and voltage compatibility to prevent damage.
Timer Not Turning On/Off
If your status plug-in timer isn’t switching as programmed, begin by double-checking the settings. Ensure the “on” and “off” times are correctly configured, paying attention to AM/PM designations on digital models. For mechanical timers, verify the pins are accurately placed on the segmented dial, corresponding to the desired activation times.
Confirm the timer is receiving power and the connected appliance is functioning correctly when plugged directly into the wall. An override function might be active, disabling the programmed schedule. Finally, a low battery (in models with backup) could cause erratic behavior.
Timer Dial Not Moving (Mechanical Timers)
If the dial on your mechanical status plug-in timer isn’t rotating, the internal motor may be faulty; Before assuming a malfunction, listen closely – place your ear near the timer when plugged in. A faint humming sound indicates the motor is attempting to operate. If no sound is present, the timer likely requires replacement.
Ensure the timer isn’t overloaded with an appliance exceeding its wattage capacity. Occasionally, dust or debris can impede the motor; however, disassembly is not recommended. Consider the age of the timer; mechanical components have a limited lifespan.
Checking if the Timer is Working
After setup, verify your status plug-in timer functions correctly. Connect a low-wattage appliance, like a lamp, to the timer. Set a short “on” and “off” cycle – for example, 5 minutes on, 5 minutes off – to observe its operation. Confirm the appliance switches as programmed during the cycle.
For digital timers, check the display to ensure the current time is accurate and the programmed schedule is visible. With mechanical timers, observe the dial’s movement and listen for the motor’s operation. If the appliance doesn’t respond, review the setup steps and wattage considerations.
Wattage and Voltage Considerations
Before connecting any appliance, carefully review the timer’s specifications regarding wattage and voltage limits. Exceeding these limits can damage the timer and potentially create a fire hazard. Typically, timers have a maximum wattage – often around 3680W (230V, 16A) – but always confirm the rating on your specific model.
Check the appliance’s label to determine its wattage and voltage requirements. Ensure the appliance’s needs are within the timer’s capacity. Using a higher wattage appliance than the timer allows can cause overheating and malfunction. Prioritize safety by verifying compatibility before use.
Connecting Your Appliance to the Timer
Once the timer is plugged into the mains outlet, you can connect your appliance. Ensure the timer is switched off or in a safe state before plugging anything in. Simply plug the appliance’s plug into the socket on the front of the timer. Confirm a secure connection to prevent accidental disconnections.
As stated in technical specifications, plug the device into the timer before inserting the timer into the mains. Avoid forcing the plug; if it doesn’t fit easily, double-check compatibility. After connecting, verify the appliance remains stable and doesn’t wobble.
Using the Timer for Security Purposes
Status plug-in timers are excellent for enhancing home security, creating the illusion of occupancy when you’re away. By scheduling lights to turn on and off at varying times, you deter potential intruders. This is particularly useful during vacations or extended absences.

As one user noted on Amazon, they utilize these timers when going out for the day, ensuring a light is on upon their return. Strategically place timers with lamps in different rooms for a more realistic effect. Combine with other security measures for optimal protection, and remember to vary the schedules periodically.
Timer Specifications (Typical)
Typical status plug-in timers operate on standard household voltage, generally 230V in the UK. It’s crucial to verify the wattage capacity before connecting appliances – often around 3680W (16A) maximum. Many digital models feature a 100-hour battery backup, preserving programmed settings during power outages, as highlighted by GTs Original Warehouse.
Mechanical timers rely on a small internal motor to rotate the dial. Digital timers offer precise programming with 24-hour or 7-day scheduling. Look for features like override buttons and summertime/wintertime adjustments. Always check the product details for specific specifications before purchase.
Where to Buy Status Plug-in Timers
Status plug-in timers are widely available from various retailers, both online and in physical stores; Amazon UK (Amazon.co.uk) is a prominent source, offering a range of models, including the 24HT16. Morrisons Online Groceries & Offers also stocks Status timers, providing convenient purchasing options. GTs Original Warehouse is another supplier specializing in these products.
Additionally, larger hardware stores like B&Q and Wickes often carry them. Electrical retailers are also good places to check. Price comparison websites can help you find the best deals. Consider checking local supermarkets as well, as availability can vary.
Maintaining Your Status Plug-in Timer
Regular maintenance ensures longevity and reliable performance of your status plug-in timer. Periodically inspect the timer for any physical damage, such as cracks or loose wiring. Keep the timer clean by wiping it with a dry cloth; avoid using liquids. For mechanical timers, ensure the dial moves freely and isn’t obstructed.
If the timer hasn’t been used for an extended period, test its functionality before reconnecting it to an appliance. Check the battery backup (if applicable) annually and replace it if necessary. Avoid exposing the timer to extreme temperatures or humidity. Proper care will maximize its lifespan.
Comparing Status Timers to Smart Plugs
Status timers offer simple, scheduled on/off control, ideal for basic needs like lamps or holiday lights. Smart plugs provide remote control via smartphone apps, offering greater flexibility and features like energy monitoring. Timers are generally more affordable and require no Wi-Fi setup, enhancing privacy.
Smart plugs excel with voice control and integration with smart home ecosystems. Timers are less susceptible to hacking or internet outages. Consider your needs: for straightforward scheduling, a timer suffices; for advanced control and automation, a smart plug is preferable.
Advanced Features (If Applicable)
Some digital status timers boast advanced programming, allowing multiple on/off cycles daily and customized schedules for different days of the week. Battery backups, often around 100 hours, preserve settings during power outages, ensuring uninterrupted operation. Override functions provide temporary manual control without disrupting the programmed schedule.
Summertime/Wintertime features automatically adjust the clock, simplifying seasonal time changes. Randomized on/off settings simulate occupancy for enhanced security while away. Certain models offer energy usage monitoring, providing insights into appliance consumption. These features elevate the timer’s functionality beyond basic scheduling.
Frequently Asked Questions (FAQ)
Q: Why isn’t my timer turning on/off? A: Ensure the timer is plugged in correctly and the appliance is securely connected. Q: How do I reset a digital timer? A: Consult the manual, but often involves holding the ‘reset’ or ‘clear’ button. Q: Can I use a timer with LED lights? A: Yes, but check the wattage rating.
Q: What does the override function do? A: It allows temporary manual control. Q: How do I adjust for daylight saving time? A: Use the dedicated summertime function. Q: What if the dial isn’t moving on a mechanical timer? A: Listen for the motor; if silent, it may be faulty.
Customer Reviews and Feedback
Many users praise the simplicity of mechanical timers, noting the ease of setting “on” and “off” times with the pin placement method. Digital timers receive positive feedback for their accuracy and battery backup, preserving settings during power outages. Some customers highlight the usefulness for automating lamps, creating a lived-in look while away.
However, a few report issues with mechanical timer motors failing over time. Others mention the digital timer’s initial setup can be slightly confusing. Overall, reviews suggest these timers are a cost-effective solution for basic scheduling needs, though smart plugs offer more advanced features.
Enjoying Automated Control
Status plug-in timers offer a straightforward path to automating your home, enhancing convenience and security. Whether you choose a mechanical or digital model, understanding the setup and features is key to maximizing their benefits. From controlling lights to managing appliances, these timers provide a simple solution for scheduled operation.
While smart plugs offer greater sophistication, status timers remain a reliable and affordable option for basic automation. Enjoy the peace of mind knowing your devices are operating on your schedule, even when you’re away, and embrace the ease of automated control!