Welcome to the Euro Pro sewing machine instruction manual! This guide provides essential information to help you understand and operate your machine effectively. Designed for both beginners and experienced sewists, it covers key features, setup, and troubleshooting tips to ensure optimal performance.
1.1 Overview of the Manual Structure
The Euro Pro sewing machine instruction manual is organized into clear sections for easy navigation. It begins with an introduction, followed by safety guidelines, parts identification, setup instructions, and operating procedures. The manual also covers maintenance, troubleshooting, and advanced features like buttonhole creation and special fabric sewing. Appendices include a glossary, diagrams, and manufacturer contact information. This structured approach ensures users can quickly find the information they need to operate and maintain their machine effectively, from basic setup to complex stitching techniques.
1.2 Importance of Reading the Manual
Reading the Euro Pro sewing machine instruction manual is crucial for safe and effective operation. It provides essential safety precautions, setup guidelines, and troubleshooting tips to prevent accidents and machine damage. Understanding the manual ensures proper threading, tension adjustment, and maintenance, optimizing performance. It also helps users explore advanced features and resolve common issues efficiently. By following the manual, you can maximize your sewing experience and extend the machine’s lifespan. Take the time to review it thoroughly before first use to ensure a smooth and enjoyable sewing process.
Safety Instructions
Safety is paramount when using your Euro Pro sewing machine. Always follow electrical guidelines, handle sharp parts carefully, and ensure proper machine setup to avoid hazards. Adhere to the provided safety precautions to ensure a secure and efficient sewing experience.
2.1 General Safety Precautions
To ensure safe operation, always follow these guidelines: Keep loose clothing and long hair tied back, avoid sewing over pins, and never touch sharp parts like needles or cutters. Use the machine on a stable, flat surface and keep children and pets away. Unplug the machine when not in use or during maintenance. Avoid sewing flammable or dangerous materials. Always use genuine Euro Pro parts to maintain safety and performance. Follow all warnings and cautions provided in this manual to prevent accidents and ensure optimal sewing experiences.
2.2 Electrical Safety Guidelines
Always use the sewing machine with the provided power cord and plug. Avoid damaging the cord or exposing it to water. Never operate the machine near water or in damp conditions. Use a grounded electrical outlet to prevent shocks. Ensure the voltage matches the machine’s requirements. Avoid using adapters or extensions that could cause overheating. Keep the machine away from direct sunlight and heat sources. Unplug the machine during storms or when not in use. Proper electrical precautions help prevent hazards and ensure safe operation.
2.3 Handling Sharp Objects and Parts
Handle sewing machine needles, cutters, and other sharp components with extreme care to avoid injury. Always use the needle inserter or tweezers for needle installation. Never touch sharp edges or points with bare hands. Store needles and cutters in a secure, child-proof container when not in use. Regularly inspect parts for damage and replace them if necessary. Keep children away from sharp objects. Proper handling ensures safety and prevents accidents while working with your Euro Pro sewing machine. Always prioritize caution when managing sharp parts to maintain a safe sewing environment.
Parts and Accessories
Explore the essential parts and accessories of your Euro Pro sewing machine, including needles, bobbins, and optional attachments like side cutters and specialized presser feet. Accessories enhance functionality, enabling diverse sewing tasks and improving efficiency. Understanding each component ensures optimal machine performance and versatility for various projects.
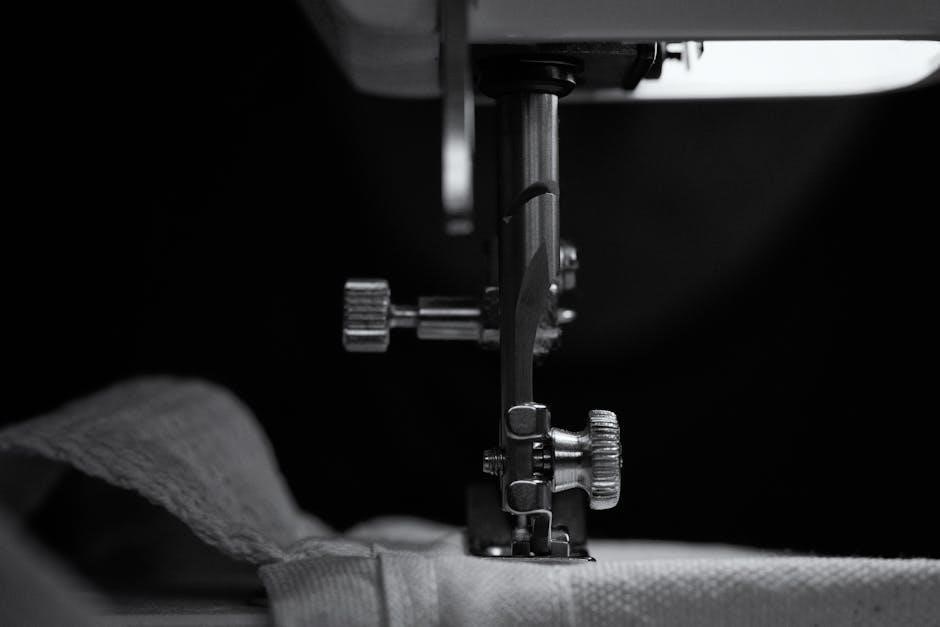
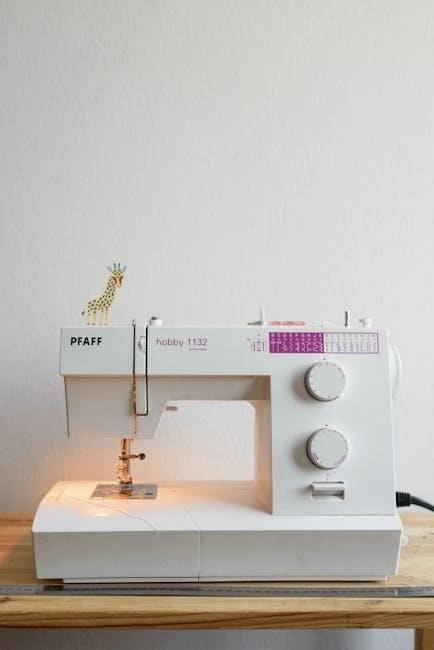
3.1 Identifying Machine Components
Identifying your Euro Pro sewing machine components is crucial for effective operation. Key parts include the spool pins, tension discs, and stitch selectors. The presser foot lever, located on the back, controls fabric movement. The bobbin area, accessed by removing a cover, houses the bobbin case. The handwheel on top allows manual needle control. Familiarize yourself with the power switch, reverse stitch lever, and thread cutters. Understanding each part’s function ensures proper setup and operation. Refer to the diagrams in this manual for a visual guide to locating and identifying these essential components accurately.
3.2 Understanding Included Accessories
Your Euro Pro sewing machine comes with essential accessories to enhance your sewing experience. These include a side cutter attachment for trimming fabric, assorted presser feet for various tasks like zigzag and buttonhole stitching, and a freearm for easier handling of large or complex projects. Additional accessories may vary by model but often include extra needles, bobbins, and a sewing chart. Familiarize yourself with these tools to maximize your machine’s capabilities and ensure versatility in your sewing projects. Refer to the diagrams for accessory identification and usage guidelines.
3.3 Optional Attachments and Features
Enhance your sewing experience with optional attachments designed for the Euro Pro sewing machine. The side cutter attachment allows simultaneous fabric trimming, while additional presser feet cater to specialized tasks like zippers or embroidery. Longarm versions offer extended workspaces for larger projects, such as quilting. Some models may include advanced features like automatic threading or stitch pattern customization. These optional components expand the machine’s versatility, enabling you to tackle a wider range of sewing projects with precision and efficiency. Explore the available attachments to tailor your machine to your sewing needs.
Setting Up Your Sewing Machine
Unpack and inspect your machine, ensuring all components are included. Oil and lubricate as instructed, then thread the machine and wind the bobbin properly for smooth operation.
4.1 Unpacking and Initial Inspection
Begin by carefully unpacking your Euro Pro sewing machine and inspecting it for any damage or missing parts; Ensure all components, such as the power cord, foot control, and accessories, are included. Refer to the manual to verify the completeness of your package. Gently wipe the machine with a soft cloth to remove any dust or debris from shipping. Familiarize yourself with the machine’s layout and features before proceeding to set it up. This step ensures a smooth and trouble-free sewing experience.
4.2 Oiling and Lubrication Instructions
Regular oiling is essential to maintain your Euro Pro sewing machine’s smooth operation. Use high-quality sewing machine oil, applying a few drops to the bobbin hook and other moving parts as indicated in the manual. Avoid over-lubrication, as excess oil can attract dust and cause mechanical issues. Gently turn the handwheel to distribute the oil evenly. This step ensures optimal performance, reduces friction, and extends the machine’s lifespan. Refer to the manual for specific oiling points and frequency recommendations.
4.3 Threading the Machine
Threading your Euro Pro sewing machine correctly is crucial for smooth operation. Begin by turning off the machine and locating the spool pin. Guide the thread through the tension discs, following the diagram in your manual. Pass the thread through the take-up lever and then through the needle bar. Gently pull the thread to ensure it is seated properly in the tension spring. Finally, thread the needle from front to back and trim any excess. This ensures consistent stitch quality and prevents thread breakage during sewing.
4.4 Winding and Threading the Bobbin
Winding the bobbin is essential for proper stitching. Place the thread on the spool pin and gently wind it around the bobbin until it’s about 3/4 full. Cut the thread, leaving a small tail. Insert the bobbin into the bobbin case, ensuring it’s securely seated. Thread the bobbin by guiding the thread through the tension spring and pulling gently to secure it. Close the compartment and test the tension by pulling the thread. Proper winding and threading ensure smooth stitching and prevent issues during sewing.
Operating the Sewing Machine
Turn on the machine, select your desired stitch, and gently place the fabric under the needle. Use the foot control to start sewing, guiding the fabric smoothly.
5.1 Basic Operation and Stitch Selection
Begin by turning on the machine and selecting the desired stitch pattern using the control panel. Place the fabric under the needle, aligning the edge with the guide. Gently press the foot control to start sewing, maintaining steady fabric movement. Use the stitch selector dial or digital screen to choose from various straight, zigzag, or decorative stitches. Adjust the stitch length and width as needed for your fabric type. Always test stitches on scrap fabric before sewing your final project to ensure optimal results.
5.2 Using the Foot Control
The foot control allows you to regulate the machine’s sewing speed. Connect it securely to the sewing machine and place it on a flat surface. To start sewing, press the foot control gently with your foot. Apply steady, consistent pressure to maintain even stitching. For reverse stitching, press the reverse button while using the foot control. Avoid sudden movements to ensure smooth fabric flow. Keep the foot control clean and dry for optimal performance. Always test the foot control before sewing to ensure it functions correctly.
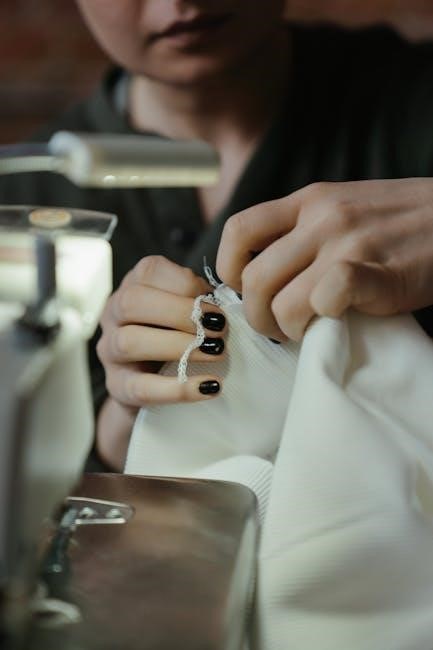
5.3 Sewing Techniques for Different Fabrics
Adjust your sewing techniques based on fabric type. For delicate fabrics like silk or chiffon, use a sharp needle and a shorter stitch length. Cotton and linen can handle standard settings, while thick fabrics like denim require a heavy-duty needle and slower speeds. Use a walking foot for layered or stretchy fabrics to prevent bunching. Always test stitch length and tension on scrap fabric before sewing your final piece. This ensures a professional finish and prevents damage to your machine or fabric.
Maintenance and Care
Regular maintenance is crucial for optimal performance. Clean and oil the machine regularly, check for worn parts, and ensure all components are in good working order. This extends the lifespan and ensures reliable stitching quality.
6.1 Cleaning the Machine
Regular cleaning is essential to maintain your Euro Pro sewing machine’s performance. Use a soft brush to remove lint and debris from the bobbin area and tension discs. Avoid harsh chemicals; instead, gently wipe surfaces with a damp cloth. Ensure all parts are dry before storing or using the machine. Cleaning after each project prevents dust buildup and ensures smooth operation. Refer to the manual for specific cleaning instructions tailored to your machine model.
6.2 Replacing the Needle
To replace the needle on your Euro Pro sewing machine, first turn off the machine and unplug it for safety. Locate the needle clamp screw, loosen it using the provided screwdriver, and carefully pull the old needle straight out. Insert the new needle with the flat side facing the correct direction (refer to your manual for specific guidance). Tighten the needle clamp screw firmly. Ensure the needle is securely seated to maintain proper stitching. Regularly replacing a dull or bent needle prevents fabric damage and ensures precise stitching. Always handle needles with care to avoid injury.
6.3 Adjusting Tension Discs
Properly adjusting the tension discs on your Euro Pro sewing machine ensures even stitching and prevents issues like loose threads or puckered fabric. To adjust, turn off and unplug the machine for safety. Locate the tension discs, typically found near the bobbin case. Use a screwdriver to gently turn the discs clockwise or counterclockwise to tighten or loosen the tension. Make small adjustments and test the stitch quality on a scrap fabric. Ensure the tension is balanced for consistent results. Refer to your manual for specific guidance, as the exact process may vary slightly by model. Regular adjustments maintain optimal performance.
6.4 Troubleshooting Common Issues
Identify and resolve common issues with your Euro Pro sewing machine to maintain smooth operation. Thread breaking or uneven stitching may indicate incorrect tension settings or dull needles. Fabric jamming could result from improper threading or debris buildup. Regularly clean the machine, especially around the bobbin area, to prevent lint accumulation. Consult the troubleshooting guide in your manual for specific solutions, such as resetting the machine or adjusting feed dogs. Addressing issues promptly ensures consistent performance and extends the machine’s lifespan. Always refer to the manual for model-specific advice.
Advanced Features and Stitching
Explore advanced stitching techniques and features to enhance your sewing projects. Learn to create professional-grade buttonholes, sew with zippers, and work with special fabrics effortlessly.Utilize unique stitch patterns for decorative finishes, ensuring versatility in your creations.
7.1 Creating Buttonholes
Master the art of creating perfect buttonholes with your Euro Pro sewing machine. Use the automatic buttonhole feature for consistent results. Start by selecting the buttonhole stitch and positioning fabric under the needle. Use a stabilizing material for smooth sewing. Measure and mark buttonhole length to match your buttons. Sew slowly, guiding fabric evenly. Trim excess thread and test buttonhole durability. For professional finishes, consider using specialized feet or attachments. This feature enhances both functionality and aesthetics in your sewing projects, ensuring precise and polished outcomes every time.
7.2 Sewing with Zippers and Special Fabrics
Enhance your sewing projects by mastering zippers and special fabrics. Use the Euro Pro’s automatic features for precise zipper installation. Select the zipper foot for smooth, aligned stitching. For special fabrics like velvet or leather, adjust stitch length and tension. Use a walking foot for heavy materials to prevent dragging. Test settings on scrap fabric before sewing to ensure optimal results. Stabilize delicate fabrics with interfacing for professional finishes. Explore advanced techniques to tackle challenging fabrics and achieve flawless seams every time.
7.3 Using Special Stitch Patterns
Unleash your creativity with the Euro Pro sewing machine’s diverse stitch patterns. From decorative stitches to functional stretch stitches, choose the perfect pattern for your project. Adjust stitch length and width for custom results. Use the stitch selector dial or digital interface to easily navigate options. Experiment with embroidery or quilting stitches for intricate designs. Pair special stitches with compatible fabrics and threads for optimal outcomes. Refer to the stitch chart in your manual for guidance. With practice, you’ll master unique stitching techniques to elevate your sewing projects to the next level.
Attachments and Accessories
Explore the versatility of your Euro Pro sewing machine with optional attachments and accessories. Enhance your sewing experience with specialized feet, side cutters, and extended workspaces for advanced projects.
8.1 Using the Side Cutter Attachment
The side cutter attachment allows you to trim fabric edges simultaneously while sewing, saving time and effort. It is ideal for creating clean finishes on seams. To use it, attach the cutter to the machine’s arm, ensuring it’s securely locked. Adjust the cutter’s position to align with your seam allowance. Always use caution when handling sharp blades. Practice on scrap fabric before working on your actual project to achieve precise results.
8.2 Installing and Using Additional Feet
Additional feet expand your sewing machine’s versatility, enabling specialized tasks like zippers, buttonholes, and blind hems. To install, remove the old foot, align the new one with the shank, and secure it tightly. Always ensure proper alignment for accurate stitching. Use the zipper foot for precise edge alignment and the blind hem foot for invisible hems. Choose the right foot for your fabric type and sewing technique to achieve professional results. Refer to the manual for specific installation instructions and troubleshooting tips.
8.3 Understanding the Freearm and Longarm Versions
The Euro Pro sewing machine offers Freearm and Longarm versions to cater to different sewing needs. The Freearm is ideal for general sewing and tight spaces, providing easy access for small projects. The Longarm version, with its extended sewing area, is perfect for quilting, home decor, and large-scale sewing. Both models ensure smooth operation and versatility. The Freearm’s compact design allows for precise control, while the Longarm’s spacious surface handles bulky fabrics effortlessly. Choose the version that best suits your sewing projects for optimal results.
Storage and Transportation
Store your Euro Pro sewing machine in a cool, dry place, away from direct sunlight. Use the original packaging or a protective cover for transportation to prevent damage.
9.1 Proper Storage Conditions
Store your Euro Pro sewing machine in a cool, dry place away from direct sunlight and moisture. Use a dust cover or original packaging to protect it from dust and debris. Avoid extreme temperatures and humidity, as this can damage internal components. Keep the machine upright to prevent oil leakage. Ideal storage conditions are in a room with consistent temperatures between 60°F and 70°F (15°C to 21°C). Avoid storing in attics, basements, or areas prone to pests. Regularly inspect stored machines for signs of damage or wear.
9.2 Safe Transportation Methods
When transporting your Euro Pro sewing machine, ensure it is securely packed in its original case or a sturdy box. Protect the machine from shocks and movement by wrapping it in bubble wrap or soft cloth. Avoid exposing it to extreme temperatures or moisture during transit. Keep the machine upright to prevent internal components from shifting. Use a reliable carrier or personal vehicle for transport, ensuring the machine is firmly secured to prevent movement. Always handle the machine with care to maintain its functionality and longevity.
Warranty and Support
This section outlines the warranty terms, customer support contact details, and troubleshooting guidance for your Euro Pro sewing machine, ensuring assistance is readily available when needed.
10.1 Understanding Your Warranty
Your Euro Pro sewing machine warranty covers parts and labor for manufacturing defects within a specified period. Registration may be required for validation. Misuse or unauthorized repairs void coverage. Contact customer support for claims or questions. Keep your proof of purchase and serial number handy for efficient service. This warranty ensures your machine performs optimally, providing peace of mind for your sewing projects. Refer to the manual for detailed terms and conditions.
10.2 Contacting Customer Support
For assistance with your Euro Pro sewing machine, contact customer support via phone, email, or live chat. Visit the official website for contact details and support hours. Representatives are available Monday to Friday, 9 AM to 5 PM EST. Provide your machine’s serial number for faster service. Online support resources include FAQs and troubleshooting guides. Ensure your inquiry includes clear details about your issue for a prompt resolution. Visit www.europrosupport.com for more information and to submit a support request.
10.3 Finding Authorized Service Centers
To locate an authorized Euro Pro service center, visit the official website and use the “Service Locator” tool. Enter your ZIP code to find nearby centers. Authorized centers ensure genuine parts and expert repairs, maintaining your machine’s warranty. Contact customer support for assistance in finding a center. Online directories and local sewing shops may also provide recommendations. Always verify authorization to guarantee quality service and adherence to manufacturer standards. Visit www.europro.com/service for a complete list of authorized service centers near you.

Tips for Optimal Performance
Ensure proper threading, use compatible needles, and manage fabric tension for consistent stitching. Regular cleaning and lubrication maintain performance and extend machine life for optimal results.
11.1 Choosing the Right Thread and Needles
Selecting the appropriate thread and needles is crucial for optimal sewing performance. Use high-quality threads that match your fabric type, such as cotton or polyester, to ensure durability. Needles should be chosen based on fabric thickness and stitch type—sharp for woven fabrics and blunt for knits. Regularly replace dull or damaged needles to prevent fabric damage and maintain even stitching. Always refer to the manual for specific recommendations tailored to your Euro Pro sewing machine model.
11.2 Managing Fabric Tension
Proper fabric tension ensures smooth stitching and prevents puckering or distortion. Start by threading the machine correctly, as outlined in the manual. Adjust the tension discs based on fabric weight and type—looser for delicate fabrics, tighter for heavier materials. Use the appropriate presser foot to guide fabric evenly. For knits, consider using a walking foot or Teflon foot to maintain consistent tension. Regularly check and adjust tension to achieve balanced stitches and professional results with your Euro Pro sewing machine.
11.3 Enhancing Stitch Quality
To enhance stitch quality, ensure proper thread preparation and machine setup. Use high-quality threads and needles suitable for your fabric type. Adjust stitch length and width according to fabric thickness and desired results. Maintain consistent fabric tension by using the correct presser foot. Regularly clean and oil the machine to ensure smooth operation. For thick fabrics, consider using a walking foot. Test stitches on scrap fabric before sewing to achieve optimal results and professional finishes with your Euro Pro sewing machine.
Appendices
The appendices provide additional resources, including a troubleshooting guide, diagrams, a glossary of sewing terms, and manufacturer contact information for further assistance and clarity.
12.1 Troubleshooting Guide
This section helps resolve common issues with your Euro Pro sewing machine. Address problems like thread jams, uneven stitching, or machine noise. Follow step-by-step solutions to identify and fix issues quickly. Refer to diagrams for visual guidance. Troubleshooting tips cover thread preparation, bobbin issues, and tension adjustments. Regular maintenance, like cleaning and oiling, is emphasized to prevent problems. Use this guide to restore your machine’s optimal performance and ensure smooth sewing experiences.
12.2 Diagrams and Illustrations
This section provides visual guides to help you understand your Euro Pro sewing machine’s components and functions. Detailed diagrams illustrate parts like the needle, bobbin, and tension discs. Step-by-step illustrations show how to thread the machine, wind the bobbin, and select stitches. Clear visuals assist in troubleshooting common issues like thread jams or improper stitch formation. Use these diagrams to identify accessories and optional attachments, ensuring proper setup and operation. The illustrations are designed to complement the written instructions, making complex tasks easier to understand and execute.
12.3 Glossary of Sewing Terms
This section provides definitions for common sewing terms used throughout the manual. Terms like “tension discs,” “bobbin,” and “stitch patterns” are explained to ensure clarity. Understanding these terms will help you operate your Euro Pro sewing machine effectively. The glossary covers technical language related to machine parts, stitching techniques, and maintenance procedures. It serves as a quick reference guide to help you familiarize yourself with sewing terminology, making your sewing experience more enjoyable and productive. Clear definitions are provided for every key term.
12.4 Manufacturer Contact Information
For assistance or inquiries about your Euro Pro sewing machine, contact the manufacturer directly. Visit their official website or refer to the provided contact details in the manual. Phone, email, and mailing address are listed for customer support. Additional resources, such as authorized service centers, are also included. This section ensures you can reach out for help with any questions or concerns about your machine, including troubleshooting, repairs, or accessing spare parts. Manufacturer support is available to ensure your sewing experience is seamless and satisfying. All contact methods are clearly outlined for your convenience.